Showing posts with label decorative. Show all posts

Saturday, January 5, 2013

Watercolor Paintings on Display to Dry

In my art studio loft for my students, I have the kids "loft dry" their watercolor paintings by hanging them on a wire with clothes pins.  In addition, we pin a ruler with clothes pins to the bottom backings of the paintings in order to keep the painting from curling.

  Not only do my students enjoy seeing their art on the walls, but it is a quick and easy way to rotate art as well. This has been especially helpful for small paintings of 8 by 10 or larger, but I imagine you could use a yard stick for even larger images.  Our favorite way to display the paintings while drying has been to hang them within a picture frame with no glass or backing.  To learn how to wire a frame like this, see a quick and simple tutorial with pictures that I have posted on my craft blog:


If you don't have rulers, you could also use thick cardboard strips or paint mixing sticks, too.  
I hope this helps! 

Sunday, August 26, 2012

Tips on Painting Interior Murals & Decorative Wall Art for Beginners


This year at the school where I teach, I was moved into a new classroom that has been neglected of interior decorating.  So before school started, I began working on small decorative murals to create a cozy and welcoming environment.  I did not want to make things too busy, so I chose to paint calm and peaceful imagery like trees, ponds and fish.  I will post the finish product as soon as I get the opportunity.  It was a really great experience and a nice change from the kind of work I do in the studio.  If you are interested in painting murals, but have never done it before, I have some tips for beginners after the following images.
Trees are great for beginners since there are so many styles that you can get away with, you can be inventive and you don't have to get terribly detailed to make a statement.  This wall is in the cleaning area of the studio.
I painted some very basic decorative art in the children's wash station.

If you are a painter but have never experienced painting murals and you are interested, just go for it!  You can always paint over something with some interior paint if you mess up, no biggy.  My tips are in no particular order and if you are lost on anything, please ask questions.

TIPS FOR STARTERS:
  • Collect interior wall paints that you have used in your own home as they work great as a base for any painting, especially to fill big spaces up like tree trunks, water and sky scenes.  
  • Buy small sample paints of fun colors you want to experiment wtih at your local home improvement retailer store.  These little samples go a long way.  For example, you can do washes to help the paint to cover large areas.  If you don't want to wait for an employee to mix the colors for you, some paint brands like Martha and Valspar sell cute little samples to experiment with.  Here is a link to show what you should look for.Paint Samples  
  • Save large brushes that you use for interior/exterior painting, even if they are beat up.  Old brushes can be good to create texture in bushes, flower patches in a distance, etc.
  • You may want to start small and simple in case you realize that it is more time consuming than you thought (which has happened to me too many times-- I never learn!)
  • Surf the web and google images of interior wall art, modern art, and decorative art ideas if you don't know where to begin.
  • Sketch designs on paper and/or start drawing directly on the wall with a light colored pencil.  If you mess up, don't worry about the pencil marks until later. I don't use led pencils for this part, because I have run into certain paints or washes that seem to have a harder time covering up pencil lines, but typically it's not a big deal if you are drawing lightly.
  • Have rags handy as it may be the best tool for blending paints.  Rags work good for washes and textures.  Old t-shirts, jeans, anything with texture (as long as it is not a material that contains too much fuzz or lint that could come off onto the wall while you are painting, and if you aren't sure test it out first).  You can dip a rag in water, ring it out and dip a little into the interior wall paint to create a nice base wash that could represent clouds, water, sky, or just to add some depth to a wall.  You might want to rub in random circular motions for clouds, bunch up and dab areas to create bushes or rocky textures, and wipe horizontally to create a soft sky.  Have a dry rag handy to wipe away any areas where the paint looks too thick. You may also want to use a sponge or a frayed paint brush to create different textures.  
  • Do not spend much time in any area when making washes and using interior/exterior paint as it will only start to get muddy.  Try to only spend a few seconds everywhere your brush/rag touches.  If you aren't terribly happy with how things are looking and it's not wiping away, WAIT for it to dry before tampering with it again.
  •  Once you have your base colors down, I find that smaller art brushes and acrylic paint works well for details on interior walls.  I usually do not use my oils since they take much longer to dry, and they may not work well on top of other paints or wall surfaces.
  • Fill the entire wall with the most basic shapes and colors before getting detailed.  In other words, keep things simple until the end, and if you feel that it needs more detail, go back.  Otherwise, if you get too detailed right off the bat, you might realize that you don't have the time or energy to get detailed in other areas.  A wall might  not look very big at first glance, but once you start working on it, you will realize that this could get very time consuming.  Unless you are going for a realistic look, a nice modern appeal is to keep things simple and painterly.

I hope this helps.  If you have more questions, just ask!


Everyone liked my classroom much that I was asked to paint a mural in another classroom.  I was happy to do so.

Sunday, February 13, 2011

Painters, Try This for a Palette

For years I've used the most typical painter's palette board to mix my paints-- you know, the ones with the thumb hole so that you can hold your pallet as you work. Or maybe just a big piece of Masonite board (also known as "hardboard" sold at your local hardware store). But most recently I have found it more efficient to use stretched canvases to mix my paints on. Why? Read on.

If you buy store-bought canvases from your local art store, which I so often do when I am on a time limit to get a painting done, you may notice that if you hold the canvas up to the light that it is somewhat translucent. This isn't necessarily a good thing. The white gesso (primer) that has already been painted on for you is meant to be a strong base that is going to help add body and strength to the painting. It also gives you a stiffer and more durable surface when you are applying heavy elements. Some painters put 5 coats of gesso on before they start their painting. The store bought canvases typically apply the thinnest coats of gesso, probably to save on money. When you paint a picture on these canvases without considering the durability, it can be really tacky when someone holds your painting up and sees that light is getting through the canvas. I learned this the hard way when I entered a show where the paintings were on glass windows instead of walls. What I'm getting to is that it doesn't hurt to prepare your store bought canvas with another coat of gesso or paint before you begin a painting on it.

SO why not build up your canvas this way: Start mixing your color pallet on a store-bought stretched canvas or one that you have already stretched and gessoed yourself. Ultimately, you will be able to use this canvas again later on down the road. Use it as a pallet until you have covered all of the white gesso base. Hold it up to the light and see how translucent your base painting is now. This can add a lot of texture to your n=base as well as some great under-paint that can add a whole different feel and quality to your next painting. If there are just too many colors for you and it is feels too busy as a base, then just paint over it with one solid color. Now you've got a really strong base that is ready to be painted on. Or maybe, you enjoy all of the different colors on your pallet and your palette might just work as a decorative painting for your house. I've got one of mine hanging up in the bathroom.

Sometimes I use old paintings that I just don't care for as a palette board. I take a picture of the painting for keepsake and then I cover the ugly thing up with rich colors. Eventually, this too will be used as a base to a new painting. Also, if you're not one to paint on canvases and prefer wood or hardboard, it doesn't hurt to use it as a pallet first either.

Photobucket
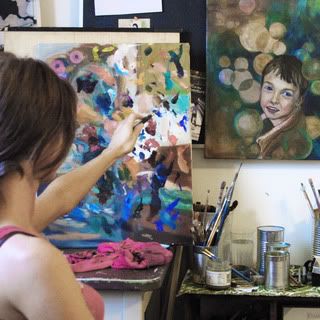
Here I have my palette standing upright. This works sometimes, depending on the consistency of the paint. This palette is in the process of covering up an old painting I didn't care for.